Flooring Sales and Installation
The final touch... new flooring. Brightening up your home and adding pizzaz has never been easier than with the help of Ayoub Carpet Service®. We make the process seamless by having the same flooring expert by your side every step of the process. With an array of choices in luxury vinyl plank and tile, hardwood, carpet, and area rugs, we are sure to have what you're looking for to finish your space. See that phone icon on the bottom of your screen? Use it to look at our options in your home! Proudly serving Northern Virginia including Arlington and the surrounding Maryland and DC areas, visit us in Falls Church or Chantilly to view hundreds of samples or call us at (703) 255-6000 to schedule a shop-at-home appointment.
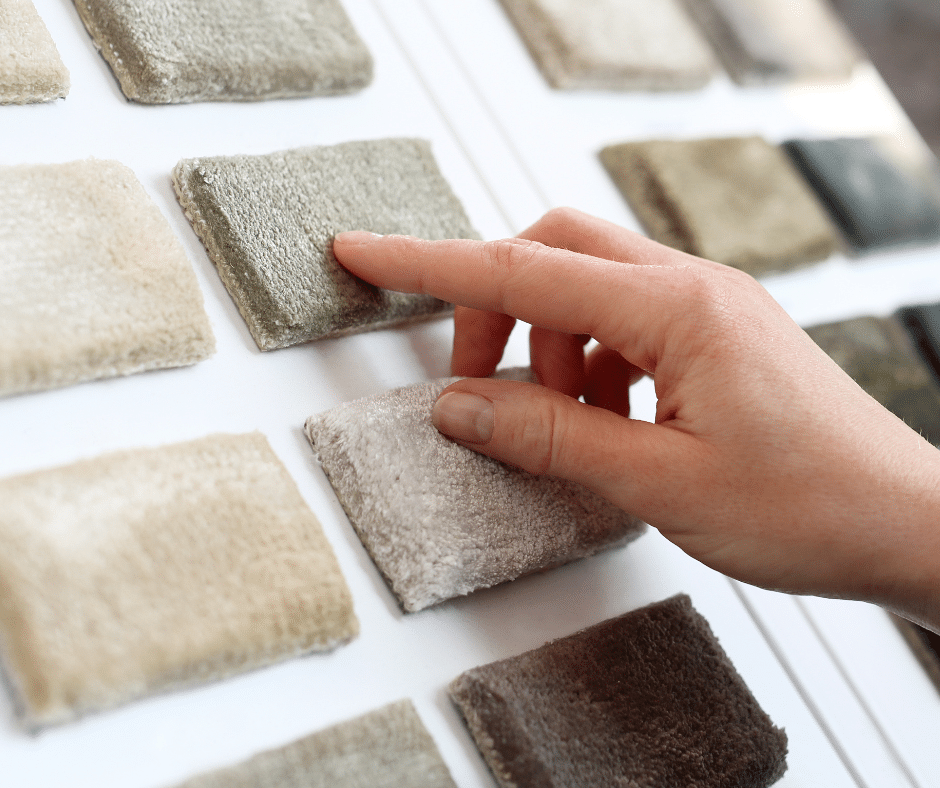
Carpet Sales
& Installation
Browse our collection of Dixie, Fabrica, Masland, Tuftex, Stanton, Shaw, and more. Our team of professionals in Northern Virginia including Arlington and the surrounding Maryland and DC areas guarantee a quick and painless installation process so you can get back to relaxing in your home!
Learn MoreHardwood Sales
& Installation
The classic, sophisticated finish to any room. With simple maintenance and elegant style, hardwood will give you the timeless look your home desires. View our traditional and engineered hardwood options available in Northern Virginia including Arlington and the surrounding Maryland and DC areas.
Learn MoreLuxury Vinyl
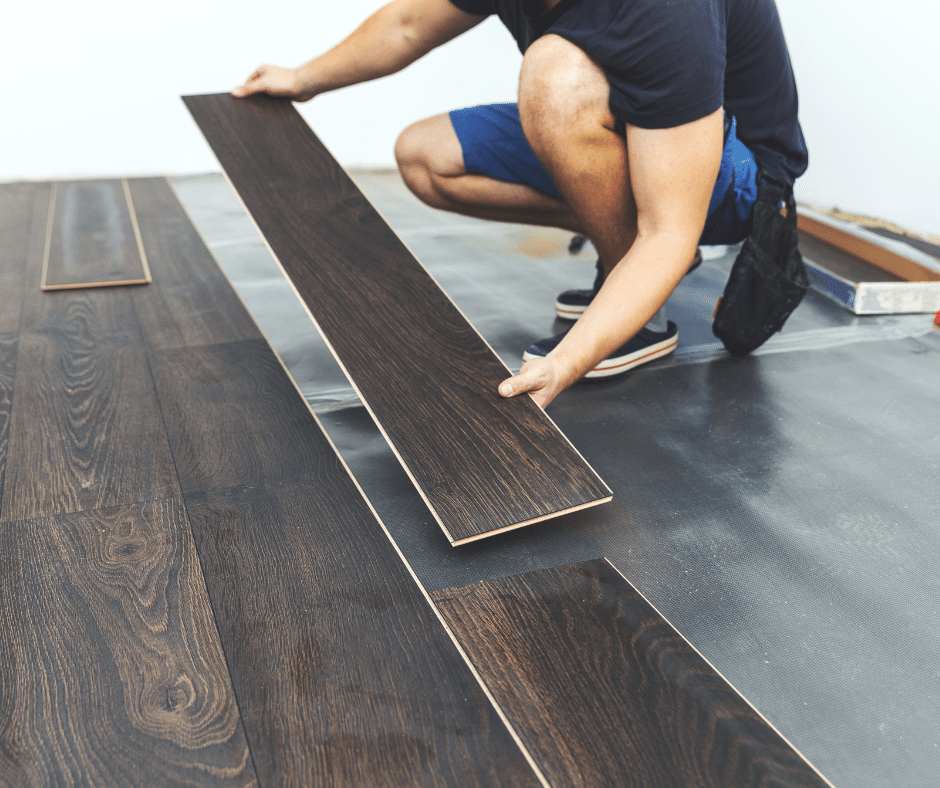
Plank & Tile
Looking for a low-maintenance flooring with the same "wow" factor as hardwood? Luxury vinyl plank is for you! With a wide range of colors, textures, and designs, LVP is the perfect choice for any home style.
Learn MoreHow to Prepare for a New Flooring Installation
When preparing for a new flooring installation, there are a few important things to keep in mind. First and foremost, it's important to choose the right type of flooring for your needs. Consider factors such as durability, ease of maintenance, and overall aesthetic appeal when making your decision. Additionally, make sure to have the space measured by a professional so that you know how much flooring material is needed. Most professionals will order a little bit extra just in case, as having to order more later can delay the installation process.
Before the installation takes place, it's also important to prepare the space properly. This may include removing any old flooring, cleaning the subfloor, and making sure the space is free of any debris or obstacles that could interfere with the installation process. You should also consider any furniture or appliances that will need to be moved or temporarily relocated to allow for the installation to take place. Finally, it's important to communicate clearly with the installation team, providing any necessary information and asking any questions you may have to ensure a successful and satisfactory outcome.
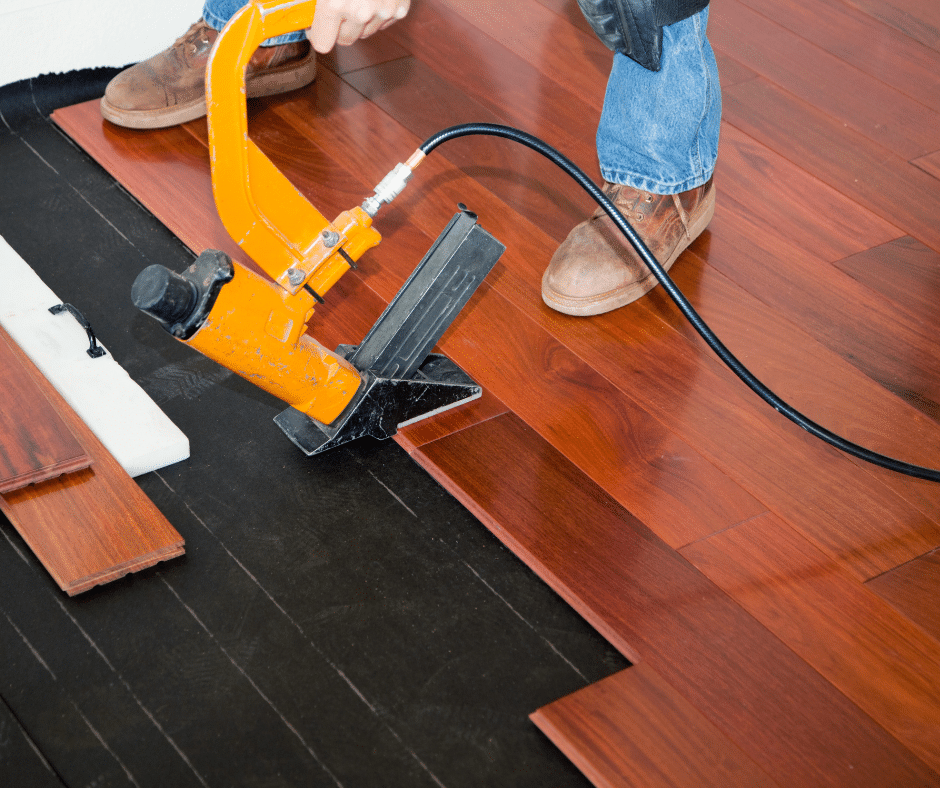
Step-by-Step Process of a Hardwood Floor Installation
- Measurement: The flooring sales expert will measure the space to determine how much product is needed and assess for any unique situations.
- Hardwood Selection: You will select the hardwood type, style, and color that you want.
- Acclimation: The hardwood planks need to acclimate to the temperature and humidity of the space for a few days before installation.
- Subfloor Preparation: The subfloor needs to be clean, dry, and level to ensure a proper installation.
- Layout: The layout of the hardwood planks should be planned out carefully to ensure a balanced and visually pleasing installation.
- Installation: The hardwood planks are installed using either a nail-down, staple-down, or glue-down method, depending on the type of hardwood flooring and subfloor.
- Sanding: Once the hardwood planks are installed, they are sanded to create a smooth and even surface.
- Staining (optional): If you want a different color or shade for your hardwood flooring, you may choose to have it stained.
- Finishing: The hardwood flooring is finished with a sealer or finish coat to protect it from damage and wear.
- Transitions, Trim, & Molding: Trim and molding are installed to cover gaps and transitions between the hardwood flooring and walls, doorways, or other surfaces.
- Cleanup: The installation team will clean up the work area and remove any debris and waste materials.
- Inspection & Approval: The installation is inspected to ensure it meets your satisfaction, and you approve the work before the team leaves the site.
Step-by-Step Process of a Carpet Installation
- Measurement: The flooring sales expert will measure the space to determine how much product is needed and assess for any unique situations.
- Carpet Selection: You will select the carpet type, style, and color that you want.
- Removal of Old Carpet: The old carpet is removed, and the subfloor is cleaned and prepared for the new carpet.
- Carpet Padding: The installation team will install padding under the carpet to provide comfort and support.
- Carpet Cutting: The carpet is cut to the appropriate size and shape to fit the space.
- Carpet Laying: The carpet is laid in place, with the installation team using tools such as knee kickers and power stretchers to ensure a tight and secure fit.
- Seaming: If necessary, the carpet may need to be seamed together to fit larger spaces.
- Tack Strips: Tack strips are installed around the perimeter of the space to hold the carpet in place.
- Trim & Molding: Trim and molding are installed to cover gaps and transitions between the carpet and walls, doorways, or other surfaces.
- Cleanup: The installation team will clean up the work area and remove any debris and waste materials.
- Inspection & Approval: The installation is inspected to ensure it meets your satisfaction, and you approve the work before the team leaves the site.
Step-by-Step Process of a Luxury Vinyl Plank or Tile Installation
- Measurement: The flooring sales expert will measure the space to determine how much product is needed and assess for any unique situations.
- LVP/T Selection: You will select the type, style, and color that you want.
- Acclimation: The LVP planks need to acclimate to the temperature and humidity of the space for a few days before installation.
- Subfloor Preparation: The subfloor needs to be clean, dry, and level to ensure a proper installation.
- Underlayment: An underlayment may be installed beneath the LVP to provide additional support and soundproofing.
- Layout: The layout of the LVP planks should be planned out carefully to ensure a balanced and visually pleasing installation.
- Installation: The LVP planks are installed using either a glue-down, click-and-lock, or loose lay method, depending on the type of LVP and subfloor.
- Trimming: The LVP planks may need to be trimmed to fit around obstacles or at the edges of the space.
- Transitions, Trim, & Molding: Trim and molding are installed to cover gaps and transitions between the hardwood flooring and walls, doorways, or other surfaces.
- Finishing: The LVP is finished with a sealer or finish coat to protect it from damage and wear.
- Cleanup: The installation team will clean up the work area and remove any debris and waste materials.
- Inspection & Approval: The installation is inspected to ensure it meets your satisfaction, and you approve the work before the team leaves the site.